|
Labappara scientific instrument https://www.labappara.com/product/objective-use-screw-gauge/ Export date: Tue Apr 1 10:56:22 2025 / +0000 GMT  |
Our objective is to use the screw gauge
Product Categories: (Class 11), Physics Experiment Product Tags: Analytical Laboratory Equipment, Educational Equipments, Lab Equipments, Labaoratory Equipment, physics Equipments, Scientific Equipment Product Page: https://www.labappara.com/product/objective-use-screw-gauge/
Product DescriptionScrew Gauge: Our Objective Our objective is to use the screw gauge;
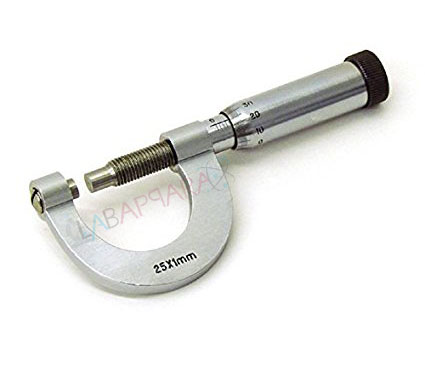
The TheoryThe screw gauge is an instrument used for measuring accurately the diameter of a thin wire or the thickness of a sheet of metal. It consists of a U-shaped frame fitted with a screwed spindle which is attached to a thimble. Parallel to the axis of the thimble, a scale graduated in mm is engraved. This is called pitch scale. A sleeve is attached to the head of the screw. The head of the screw has a ratchet which avoids undue tightening of the screw. On the thimble there is a circular scale known as head scale which is divided into 50 or 100 equal parts. When the screw is worked, the sleeve moves over the pitch scale. A stud with a plane end surface called the anvil is fixed on the ‘U' frame exactly opposite to the tip of the screw. When the tip of the screw is in contact with the anvil, usually, the zero of the head scale coincides with the zero of the pitch scale. Pitch of the Screw GaugeThe pitch of the screw is the distance moved by the spindle per revolution. To find this, the distance advanced by the head scale over the pitch scale for a definite number of complete rotation of the screw is determined. The pitch can be represented as; Least Count of the Screw GaugeThe Least count (LC) is the distance moved by the tip of the screw, when the screw is turned through 1 division of the head scale. The least count can be calculated using the formula; Zero Error and Zero CorrectionTo get the correct measurement, the zero error must be taken into account. For this purpose, the screw is rotated forward till the screw just touches the anvil and the edge of cap is on the zero mark of the pitch scale. The Screw gauge is held keeping the pitch scale vertical with its zero down wards. When this is done, anyone of the following three situations can arise:
To find the diameter of the lead shotWith the lead shot between between the screw and anvil, if the edge of the cap lies ahead of the Nth division of the linear scale. Then, linear scale reading (P.S.R.) = N. If nth division of circular scale lies over reference line. Then, circular scale reading (H.S.R.) = n x (L.C.) (L.C. is least count of screw gauge) Total reading (T.R.) = P.S.R. + corrected H.S.R. = N + (n x L.C.). If D be the mean diameter of lead shot, Then, volume of the lead shot, To find the diameter and hence to calculate the volume of the wirePlace the wire between the anvil and the screw and note down the PSR and HSR as before. The diameter of the wire is given by; If r is radius of the wire, and l be the mean length of the wire. Then, volume of the wire, To find the thickness of the glass plateThe glass plate is gripped between the tip of the screw and the anvil. The PSR and HSR are noted as before. The thickness of the glass plate is; To find the Volume of glass plate (irregular lamina)Find the thickness, t of irregular lamina as before. Then place the lamina over a graph paper and trace its outline on the graph paper. The area A of the lamina is taken from the graph paper. The volume of the glass plate is calculated from the equation; Learning OutcomesThe students learns;
|
|
Product added date: 2017-11-22 17:30:30 Product modified date: 2018-05-23 17:05:56 |
|
Export date: Tue Apr 1 10:56:22 2025 / +0000 GMT Product data have been exported from Labappara scientific instrument [ https://www.labappara.com ] Product Print by WooCommerce PDF & Print plugin. |
